What is the Lucid Education Suite?
All UTK Canvas course sites include access to the Lucid Education Suite, empowering instructors and students with visual collaboration solutions anytime and anywhere within Canvas. The Lucid Education Suite comprises Lucidspark, a collaborative virtual whiteboard, and Lucidchart, an intelligent diagramming application.
Set up the Integration (Instructor)
- In Canvas, open a new assignment, page, quiz, or discussion.
- From the Rich Content Editor toolbar, click the Lucid icon.

- Review your role and select the answer regarding the age of your students.
- Click Next.
- Click Connect.
- If you do not have a Lucid account, click Sign up. A Lucid account will be created for you connected to the email address on your Canvas account (NetID@tennessee.edu).
- If you have a Lucid account but are not logged in, click Log In.
- If you are already logged in to a Lucid account, click Connect to Lucid.
- Click Continue.
- Click Get Started.
- Review the permissions and click Grant Access.
Your Lucid account is now connected, allowing you to access, create, and edit documents from Canvas.
Set up the Integration (Student)
- Click the assignment, page, quiz, or discussion where your instructor is utilizing the Lucid Education Suite.
- Select whether you are under 13 years of age.
- Click Next.
- Click Connect.
- If you do not have a Lucid account, click Sign up. A Lucid account will be created for you connected to the email address on your Canvas account (NetID@tennessee.edu).
- If you have a Lucid account but are not logged in, click Log In.
- If you are already logged in to a Lucid account, click Connect to Lucid.
- Click Continue.
- Review the permissions and click Grant Access.
Your Lucid account is now connected, allowing you to access, create, and edit documents from Canvas.
Embed a Lucid Document
- Open a new Canvas assignment, page, quiz, or discussion.
- From the Rich Content Editor toolbar, click the Lucid icon.

- In the panel that appears, select an existing Lucid document.
- You can also create a new document or select a template by clicking + New in the top-left corner.
- Click Continue in the bottom-right corner of the panel.
- Select “Edit”, “Comment only”, or “View only” permissions for the Lucid document.
- If you select “View only” permissions, you can choose a viewer type (rich or simple) and whether you want the document to auto-update. If you uncheck the box for automatic updates, the embedded Lucid document will not display any new edits.
- Click Insert.

- Click Save & Publish in the bottom-right corner of the Canvas assignment, page, quiz, or discussion.
Students can now edit, comment, or view the Lucid document directly from the Canvas assignment, page, quiz, or discussion according to the permissions you set in Step 5.
NOTE: Embedding a Lucid document into the Canvas Rich Content Editor in an assignment, page, quiz, or discussion does not create a new copy for all students. If students are given edit permissions, they all share and edit the same document, making it ideal for collaborative work.
Create an Assignment
To create an assignment from a Lucid document, follow these steps:
- Open a new assignment in Canvas.
- Next to “Submission Type”, select Lucid from the drop-down menu.
- Click the Lucid button to open a pop-up window.
- Click Lucidspark or Lucidchart depending on your assignment.
- Click Next.
- Determine what type of document you want students to have a copy of:
- Blank document/Blank board: Gives students a blank Lucid document to work from for their assignment.
- My documents: Allows you to choose a template or one of your existing documents for students to work from.
- Click Next.
- If you chose to select from your Lucid documents, select the document you want students to have a copy of, then click Select.
- To choose one of Lucid's premade templates, click + New in the top-right corner, click Create from Template, then select a template.
- Click Select on the External Tool popup to finalize the setup.
- Select Save & Publish from the bottom-right corner of the Canvas assignment.
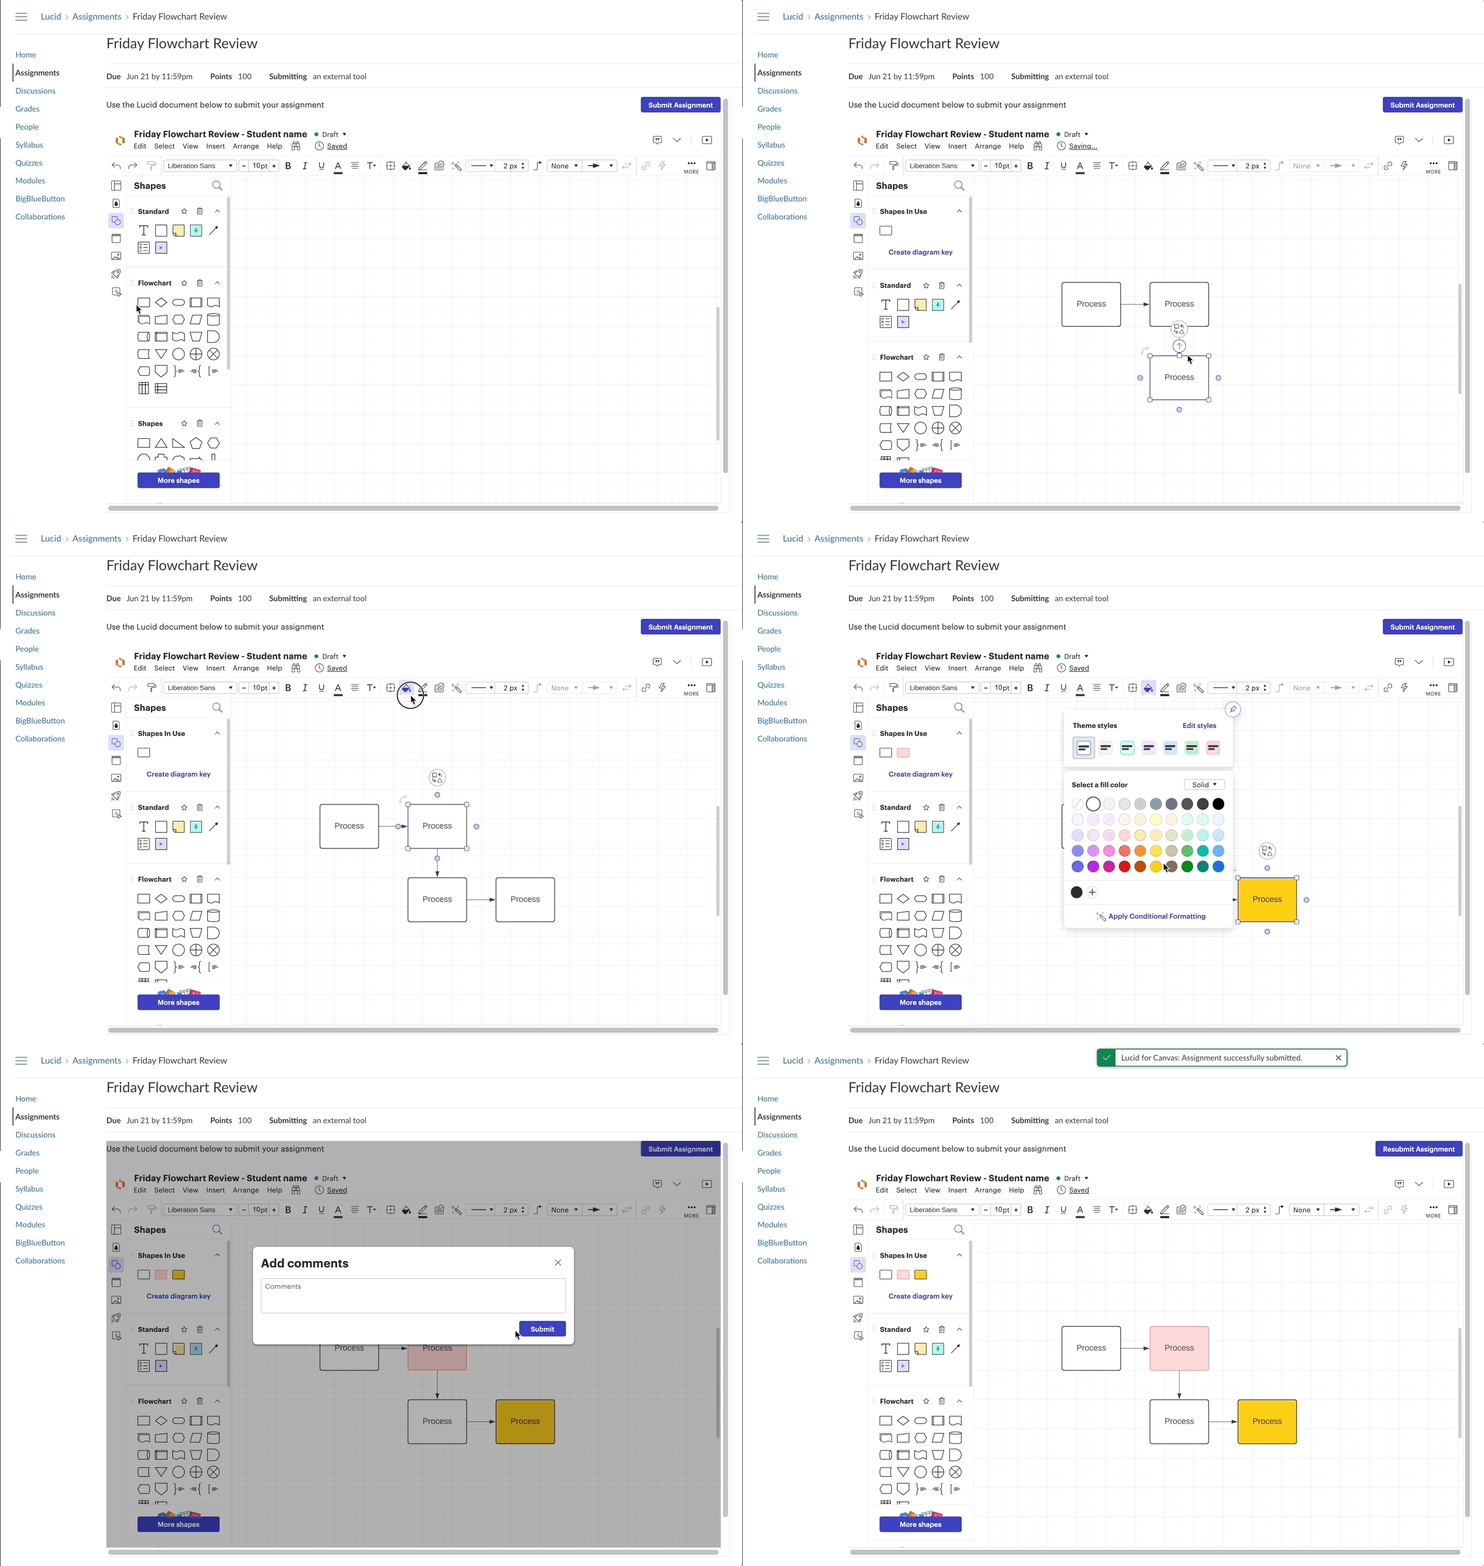
When students open the assignment in Canvas, a new Lucid document will be added to their account (either a new blank document or a copy of the document you selected). Students will be able to access and edit the document directly from within Canvas as shown below:

Note: When students submit an assignment, a PDF version of the document is exported and displayed in SpeedGrader. Any edits students make after submitting the assignment will not be visible unless they resubmit.